
Ok....first of all I have to say that I am NOT a planner. My husband will be the first to tell you that most times I 'fly by the seat of my pants". I like to wing it....and he's the planner, the list maker, the preparer, etc.
My 'non-planner' characteristic not only shows in my daily life but also flows over to my scrapbooking. And today I am going to show you how I go about creating a LO just flying by the seat of my pants!
*Warning: This post is picture heavy* lol
Because I do not PLAN what I'm going to use on a LO, I cannot give you a supply list for this project. I can, however, tell you that IF you have this kit:

AND...a sheet of Kraft cardstock...then you are all set!
I usually start by laying out all my kit materials to the side of my work space, so that I can see what I have to work with.
I decided I was going to use this shaped piece of Little Yellow Bicycle Decorative cardstock.

But then I decided to cut the centre out, just on a whim! lol

I kind of liked the way it looked!
Oh....before I go any further...I should tell you that at this point I did have my photo and title picked out, but sometimes I start a LO without even knowing the photo I will use. (yep...totally on a whim!). I'll show you those picture in a minute.
I thought the background paper needed something a little extra, so I decided to use my Sunshine Glimmer Mist, but you could really use any color! I placed the centre cut out from the sheet of cardstock and placed it on my kraft paper, and put it in my glimmer misting tray. (a.k.a. BlueMoon Shipping box)

Did you realize that by placing your project in this box BEFORE spraying can save you a lot of extra hours of cleaning up glimmer mist from your carpet??? ;o)
Yep, I like how this turned out!

What to know my trick for getting my papers to dry flat after Glimmer misting?
Here it is...I actually work on an old shelving piece placed on my table top, so I lay a sheet of cardstock on top of my page that I glimmer misted (I use the same one over and over), and I place it under my piece of shelving. Gives it just enough weight to keep it flat while I prepare other things for the LO.

See...nothing fancy!
Then I start preparing my photo(s)
I took one photo, but I wanted to make it look like two so I cut it in half and matted with the Basic Grey paper, each side separately.

Then I started playing around with some different papers to brighten up the LO.

LOVE that Girlz Paperie paper!! Looks pretty, but needs more!

Yep, prettier...just flipped a pieced of that same paper for the other part of the photo.
Ok, now it's coming together. See how I switched the paper up again? That's how my mind works. Then I glue it down....after I use my border punch and ink on everything!

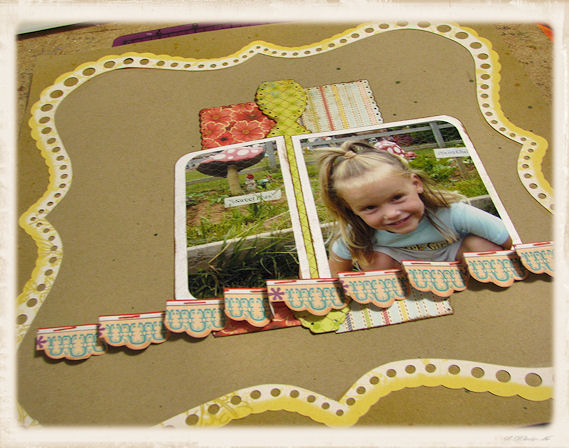
I had originally planned on placing this Sassafrass sticker border under the other border....but I think this works much better!
And...then a little bit of added embellishments....some of my trademark doodling!!
And .....voila!

Check out my Scrap 'n Doodle blog to see some more closeu[s of this LO!
So there! That's how my LOs usually come together, and that's why I love playing with kits so much! Everything is right there in front of me. It's kind of like someone else planned my supplies so that I didn't have too! And with me being a non-planner and all....that works perfectly!! :o)
I hope you've enjoyed my evolution of a LO!
Now, hurry out and pick up Gypsy Carnival Kit before they are all gone!


Susan this is so cute! Love the stitching!
ReplyDeleteLoveeeeeeeeeeeeeeee this SUSAN!!! Loveeeeeeeeee the photos and the misting! :):):):):):):):):):):):):):):):):):):):)
ReplyDeletesoo cool! love it, girl! and gorgeous layout! That kit is pretty darn cool!
ReplyDelete